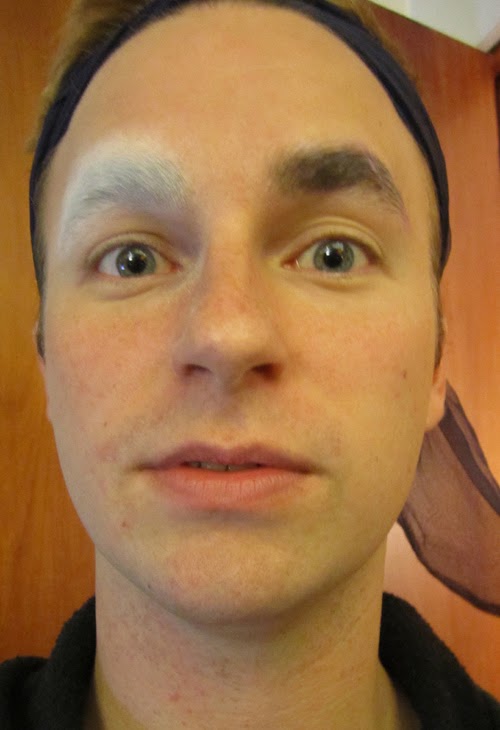
It's probably one of the most popular subjects in the world of beauty and fashion, and it's certainly one of the most sought-after YouTube tutorials: how do I make myself look amazing with makeup without looking like I'm wearing said makeup? And while there are a number of great how-tos floating about the internet, the fact of the matter is that what works best for you is really going to depend on your skintone, your preferences, and what you perceive as your "flaws." I do, however, have some basic tips for this sort of look, which always earns me loads of compliments, some of which are admittedly borderline creepy. (And I quote: "If I could, I would steal your skin, bottle it up, and sell it!" Erm...thanks?) Please remember that these are tips, not rules, and you are always encouraged to experiment and find what works best for you.
TIP #1: Be aware of your weaknesses. Try to push past them, but don't beat yourself up over them.
You've probably noticed that, despite the fact that this is supposed to be a makeup-less makeup look, I have rather strong brows. This is my weakness: it's almost impossible for me to put on my makeup and not give myself a strong brow. My eyebrows are naturally quite light, fine, and messy, and as my good friend Sara once mentioned, it is nigh-on impossible to walk out of the house without doing your eyebrows if you've gotten used to penciling them in. I am therefore well-aware that when I do this sort of makeup, I will almost always end up looking like I'm not wearing any makeup...except for heaps of brow pencil. And I don't beat myself up over that. At the end of the day, it's not so much about how well you replicate a certain look, it's about how good you feel when you walk out the door.
TIP #2: Always, always, always use products that work well for your skintone.
If you want to look like you're not wearing makeup, one of the worst things you can do is use a foundation that's too dark or a blush that's a completely unnatural tone (ie, a bright orange blush that stays bright orange on your cheeks--nobody blushes orange). This can be tricky if you're on the "extreme ends" of the skintone spectrum, ie very fair (like me) or very dark. Most foundations, concealers, and powders won't come in shades that suit your skintone, and most blushes and brow products will either be very difficult to blend out so that they look natural or just won't show up. Take the time to test a lot of products and figure out what works for you; it took me several years to find just a few products that matched me perfectly.
TIP #3: Watch out for "extreme" finishes, like extremely matte, extremely dewy, and extremely shimmery.
Your skin may naturally be quite oily or dry, but the trick with no makeup makeup is that you want to look like your skin is naturally balanced and healthy: not super-oily, but with that slight "glow of youth." And glitter is most certainly not something that just pops up on your skin! This means that, for the most part, you'll want to use products that are demi-matte or satin finish to best mimic the appearance of real skin; you can then add highlights with a product that is glowy, but not glittery, to the points where you need it. Exceptions to this rule would be people with very oily and very dry skin, who will need a more matte or more moisturizing base, respectively, to keep their skin looking nice throughout the day.
TIP #4: If you don't absolutely need it, don't use it.
I used foundation for the FOTD that heads this post because I was experiencing some skin sensitivity and therefore had a bit more redness to my face than what is usual. But for the most part, when I do no makeup makeup, I skip foundation altogether and just use a bit of concealer on my undereye circles and the occasional blemish. This is one of the hardest parts of no makeup makeup: it's meant to look "real" and "natural," so if you have to be willing to let your supposed "flaws" shine through a little. Almost nobody, without makeup, has a uniform skintone with no variance in color or texture, huge Kardashian-style eyelashes, or glossy coral lips. If your brows are already quite lovely, brush them in to place, maybe set them, but leave it at that. If your lips are naturally quite pigmented, just use a bit of lip balm. If you have freckles, let them shine through. Remember that the point isn't to look hyper-real and flawless: while beautiful, those types of looks always indicate that you're wearing makeup.
Products Used and Recommendations

1. I used a small amount of Too Faced Shadow Insurance ($18, Sephora) on my eyelids and undereyes to prevent them from getting super-shiny and oily. If you use a face primer, you can also run that over your eyelids, brows, etc. If the skin around your eyes is dryer, consider moisturizing it 10-15 minutes before you apply your makeup.
2. Because there are next to no color cosmetics in this look, I moved right on to perfecting my base. On this occasion, I used a thin layer of Vapour Organic Beauty Atmosphere Luminous foundation ($40, VapourBeauty.com) to even out my skintone. With this kind of makeup, it's best to stick with very sheer, thin foundations like this, then add concealer wherever necessary. Other foundations I've used for this sort of look include MAC Face & Body ($27-$33, MACCosmetics.com) and Revlon New Complexion ($10-15, drugstores). I also recommend using your figures to apply your foundation, as this tends to spread the foundation thinner (making it look more natural) and can make this look a quick no-brush option.
3. VOBALF evened out my sensitivity redness, so I just concealed my undereyes with a sheer, demi-matte concealer: Clinique Airbrush concealer ($19.50, Sephora). If I skip foundation, I tend to use Kevyn Aucoin Sensual Skin Enhancer ($45, Nordstrom) as needed; I have a tutorial for this KA SSE application method right over here.
4. I tend to keep a few mascaras around: a natural mascara, a layerable mascara, and a dramatic mascara. Obviously, the dramatic mascara is not an option for this kind of look, so I went with the layering mascara, which is also my HG: Prestige My Biggest Lashes ($6.50, Ulta). You can keep layering this product for uber-thick, full, black lashes, but I stuck with one coat and combed out the few clumps with my fingers. Always pick a mascara that's tried and true, one that you know won't smudge or flake on your lashes, as smudges and flakes are obvious signs that you're wearing makeup. My current favorite natural mascara is Estee Lauder Sumptuous ($22, Nordstrom); I would also recommend Maybelline Full n' Soft ($6.50, drugstores) and Bobbi Brown No Smudge Mascara ($24, Sephora).
5. Oh, brows, my weakness! I used my beloved La Femme brow pencil ($1.50, MakeupMania.com) and went very full-on, but because this is a harder pencil, you can get quite a natural look if you use a lighter hand. The Shu Uemura Hard Formula brow pencil ($24, ShuUemura-USA.com) is another great option if you prefer a pencil. If you just need a bit of help, considering using a matte eyeshadow to fill in gaps, or just add a hint of brow gel, which--
6. --my favorite is the Anastasia Clear Brow Gel ($21, Sephora). I keep a mini-tube in my purse at all times! It smells awful, but no other brow gel is able to groom and hold my brow hairs so well without making them feel crispy. They also make tinted versions.
7. When it comes to blushes, I will almost always recommend a liquid formula for this kind of look, since they tend to be sheerer and more blendable. My favorites are the Becca Beach Tints ($25, Sephora). If you don't plan on using a highlighter, certain cream blush formulas can add a bit of glow to your cheeks, like a Kevyn Aucoin Creamy Moist Glow ($24, Nordstrom); just use a very light touch, as many cream blushes are opaque and saturated with pigment. If you have trouble getting liquid blushes to show up on your skin, go for a buildable, matte powder blush that's easy to blend out; Sleek Blusher ($6, SleekMakeup.com) and Lancome Blush Subtil ($30, Sephora.com) are some of my favorite formulas.
8. I always finish off with a highlighter that's glowy, but not shimmery, and hard to overdo. In this case, I used the Becca Shimmering Skin Perfector in Pearl ($41, Sephora). (This is actually a little sample pot that a very kind friend sent me!) If you prefer a powder, consider the Kevyn Aucoin Celestial powder in Candlelight ($42, Nordstrom). MAC Cream Colour Bases ($18.50, MACCosmetics.com) come in a number of highlight shades, if you're looking for something more affordable, but be forewarned: these are buildable and can be overdone.

I've posted two similar no makeup makeup looks with breakdowns/tutorials in the past, so I will link those down below. Here's hoping these posts have helped!
Hyper-Glow post
No-Makeup-Makeup/Minimalism