Showing posts with label brand: La Femme. Show all posts

Wednesday, April 24, 2013

Painting for the Back Row


Have you ever been to a drag show? If not, you're missing out on some mega-super-fantastic SERIOUS fun! This year, I not only watched the fantastic drag show at one of my local universities, I also pitched in and helped a bit with the makeup for a truly hilarious "Gangnam Style" routine. The task was to essentially paint the back-up dancers like baby drag queens, which, hey, no problem...except there were a few more dancers than I expected: five. FIVE! But with plenty of help from lovely friends and my amazing ability to pilfer cosmetics from the collections of others, we were able to get it done.


All of these lovely ladies were kind enough to use their own foundations and concealers, except for the few ladies who didn't own foundation or concealer at all. They were all beautiful, of course, so it wasn't even really necessary.

Plenty of saturated colors were needed, so I started with Too Faced Shadow Insurance on all of their lids before applying various shades of Mehron Aqua Color in a cat-eye shape. I set the Aqua Colors with matte powder eyeshadows by Ben Nye and Wet n' Wild. The huge lashes are from Mehron and were definitely a splurge, but they were totally worth it! Several of the dancers kept their sets. Eyebrows were liberally darkened with various shades of Maybelline Define-a-Brow (which I admit I'm not a fan of--most of the shades seemed quite red, and I had to click the pencils up a zillion times) with the exception of the two blonde ladies; for them, I used my own Clinique Superfine Liner in Soft Blonde.

The cheek colors are La Femme powder blushes in various mixtures of Flamingo Pink, Coral Spice, Terracotta, Purple Passion, and Fuchsia. Three highlighters were used liberally on the cheekbones: MAC Cream Color Base in Luna for the palest ladies, MAC Glimmer Shimmer in Orange Twink over warm blushes, and Hard Candy Glow All the Way Luminzer in Doll Face over cool blushes.

Three shades of lipstick were used: NYX Strawberry Milk, NYX Louisiana, and MAC Coral Polyp. The original plan was to add MAC Clear gloss on top, but they were already quite shiny/bright, and we were running out of time. No-brainer right there.

To finish them off and give them a majorly Shellac'ed appearance, I had them close and cover their eyes (as Mehron Aqua Colors are not waterfast unless you use certain mixing mediums) while I sprayed them with liberal amounts of ELF Studio Makeup Mist & Set.


The fantastic drag king seen here, Papi Choulo, did his own makeup using Ben Nye Creme Colors.


I didn't have much time to my makeup, unfortunately, because it was a rainy day that involved lots of running around. But I did manage to slap on some MAC Party Parrot right before the show started! The two lovely gents with me are my good friends Dan (out-of-drag queen Scarlet Fairweather), who made several special appearances, and Joe, who helped organize the festivities.

Tuesday, January 22, 2013

Tips for "No Makeup Makeup"


It's probably one of the most popular subjects in the world of beauty and fashion, and it's certainly one of the most sought-after YouTube tutorials: how do I make myself look amazing with makeup without looking like I'm wearing said makeup? And while there are a number of great how-tos floating about the internet, the fact of the matter is that what works best for you is really going to depend on your skintone, your preferences, and what you perceive as your "flaws." I do, however, have some basic tips for this sort of look, which always earns me loads of compliments, some of which are admittedly borderline creepy. (And I quote: "If I could, I would steal your skin, bottle it up, and sell it!" Erm...thanks?) Please remember that these are tips, not rules, and you are always encouraged to experiment and find what works best for you.

TIP #1: Be aware of your weaknesses. Try to push past them, but don't beat yourself up over them.

You've probably noticed that, despite the fact that this is supposed to be a makeup-less makeup look, I have rather strong brows. This is my weakness: it's almost impossible for me to put on my makeup and not give myself a strong brow. My eyebrows are naturally quite light, fine, and messy, and as my good friend Sara once mentioned, it is nigh-on impossible to walk out of the house without doing your eyebrows if you've gotten used to penciling them in. I am therefore well-aware that when I do this sort of makeup, I will almost always end up looking like I'm not wearing any makeup...except for heaps of brow pencil. And I don't beat myself up over that. At the end of the day, it's not so much about how well you replicate a certain look, it's about how good you feel when you walk out the door.

TIP #2: Always, always, always use products that work well for your skintone.

If you want to look like you're not wearing makeup, one of the worst things you can do is use a foundation that's too dark or a blush that's a completely unnatural tone (ie, a bright orange blush that stays bright orange on your cheeks--nobody blushes orange). This can be tricky if you're on the "extreme ends" of the skintone spectrum, ie very fair (like me) or very dark. Most foundations, concealers, and powders won't come in shades that suit your skintone, and most blushes and brow products will either be very difficult to blend out so that they look natural or just won't show up. Take the time to test a lot of products and figure out what works for you; it took me several years to find just a few products that matched me perfectly.

TIP #3: Watch out for "extreme" finishes, like extremely matte, extremely dewy, and extremely shimmery.

Your skin may naturally be quite oily or dry, but the trick with no makeup makeup is that you want to look like your skin is naturally balanced and healthy: not super-oily, but with that slight "glow of youth." And glitter is most certainly not something that just pops up on your skin! This means that, for the most part, you'll want to use products that are demi-matte or satin finish to best mimic the appearance of real skin; you can then add highlights with a product that is glowy, but not glittery, to the points where you need it. Exceptions to this rule would be people with very oily and very dry skin, who will need a more matte or more moisturizing base, respectively, to keep their skin looking nice throughout the day.

TIP #4: If you don't absolutely need it, don't use it.

I used foundation for the FOTD that heads this post because I was experiencing some skin sensitivity and therefore had a bit more redness to my face than what is usual. But for the most part, when I do no makeup makeup, I skip foundation altogether and just use a bit of concealer on my undereye circles and the occasional blemish. This is one of the hardest parts of no makeup makeup: it's meant to look "real" and "natural," so if you have to be willing to let your supposed "flaws" shine through a little. Almost nobody, without makeup, has a uniform skintone with no variance in color or texture, huge Kardashian-style eyelashes, or glossy coral lips. If your brows are already quite lovely, brush them in to place, maybe set them, but leave it at that. If your lips are naturally quite pigmented, just use a bit of lip balm. If you have freckles, let them shine through. Remember that the point isn't to look hyper-real and flawless: while beautiful, those types of looks always indicate that you're wearing makeup.

Products Used and Recommendations


1. I used a small amount of Too Faced Shadow Insurance ($18, Sephora) on my eyelids and undereyes to prevent them from getting super-shiny and oily. If you use a face primer, you can also run that over your eyelids, brows, etc. If the skin around your eyes is dryer, consider moisturizing it 10-15 minutes before you apply your makeup.

2. Because there are next to no color cosmetics in this look, I moved right on to perfecting my base. On this occasion, I used a thin layer of Vapour Organic Beauty Atmosphere Luminous foundation ($40, VapourBeauty.com) to even out my skintone. With this kind of makeup, it's best to stick with very sheer, thin foundations like this, then add concealer wherever necessary. Other foundations I've used for this sort of look include MAC Face & Body ($27-$33, MACCosmetics.com) and Revlon New Complexion ($10-15, drugstores). I also recommend using your figures to apply your foundation, as this tends to spread the foundation thinner (making it look more natural) and can make this look a quick no-brush option.

3. VOBALF evened out my sensitivity redness, so I just concealed my undereyes with a sheer, demi-matte concealer: Clinique Airbrush concealer ($19.50, Sephora). If I skip foundation, I tend to use Kevyn Aucoin Sensual Skin Enhancer ($45, Nordstrom) as needed; I have a tutorial for this KA SSE application method right over here.

4. I tend to keep a few mascaras around: a natural mascara, a layerable mascara, and a dramatic mascara. Obviously, the dramatic mascara is not an option for this kind of look, so I went with the layering mascara, which is also my HG: Prestige My Biggest Lashes ($6.50, Ulta). You can keep layering this product for uber-thick, full, black lashes, but I stuck with one coat and combed out the few clumps with my fingers. Always pick a mascara that's tried and true, one that you know won't smudge or flake on your lashes, as smudges and flakes are obvious signs that you're wearing makeup. My current favorite natural mascara is Estee Lauder Sumptuous ($22, Nordstrom); I would also recommend Maybelline Full n' Soft ($6.50, drugstores) and Bobbi Brown No Smudge Mascara ($24, Sephora).

5. Oh, brows, my weakness! I used my beloved La Femme brow pencil ($1.50, MakeupMania.com) and went very full-on, but because this is a harder pencil, you can get quite a natural look if you use a lighter hand. The Shu Uemura Hard Formula brow pencil ($24, ShuUemura-USA.com) is another great option if you prefer a pencil. If you just need a bit of help, considering using a matte eyeshadow to fill in gaps, or just add a hint of brow gel, which--

6. --my favorite is the Anastasia Clear Brow Gel ($21, Sephora). I keep a mini-tube in my purse at all times! It smells awful, but no other brow gel is able to groom and hold my brow hairs so well without making them feel crispy. They also make tinted versions.

7. When it comes to blushes, I will almost always recommend a liquid formula for this kind of look, since they tend to be sheerer and more blendable. My favorites are the Becca Beach Tints ($25, Sephora). If you don't plan on using a highlighter, certain cream blush formulas can add a bit of glow to your cheeks, like a Kevyn Aucoin Creamy Moist Glow ($24, Nordstrom); just use a very light touch, as many cream blushes are opaque and saturated with pigment. If you have trouble getting liquid blushes to show up on your skin, go for a buildable, matte powder blush that's easy to blend out; Sleek Blusher ($6, SleekMakeup.com) and Lancome Blush Subtil ($30, Sephora.com) are some of my favorite formulas.

8. I always finish off with a highlighter that's glowy, but not shimmery, and hard to overdo. In this case, I used the Becca Shimmering Skin Perfector in Pearl ($41, Sephora). (This is actually a little sample pot that a very kind friend sent me!) If you prefer a powder, consider the Kevyn Aucoin Celestial powder in Candlelight ($42, Nordstrom). MAC Cream Colour Bases ($18.50, MACCosmetics.com) come in a number of highlight shades, if you're looking for something more affordable, but be forewarned: these are buildable and can be overdone.


I've posted two similar no makeup makeup looks with breakdowns/tutorials in the past, so I will link those down below. Here's hoping these posts have helped!

Hyper-Glow post
No-Makeup-Makeup/Minimalism

Monday, October 29, 2012

And now, Miss Scarlet beats her face.


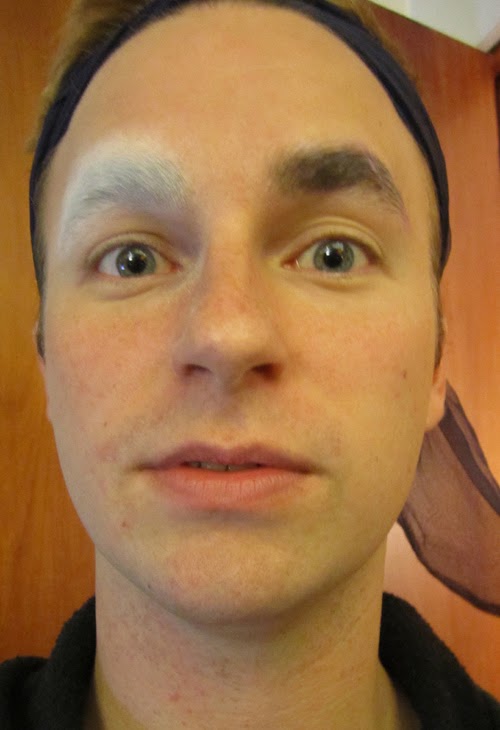
Is it any surprise that I love drag queens? Probably not, but it's probably a little surprising that a drag queen consented to do a tutorial for this blog. Meet Miss Scarlet Fairweather, who pops up on BOGL from time to time because she's A) super nice, and B) pretty damn fabulous. Even though her Poison Ivy costume was falling to bits before my eyes, she agreed to let me document her beating her face for a tutorial-type post.


Scarlet starts out by shaving and moisturizing, if necessary. ("At the very least, moisturize your lips, because you're probably going to abuse them!") Elmer's glue stick (often referred to as "Ru-Glue") was used to flatten her brows. They were then powdered down with Hard Candy Welcome Matte powder.


Scarlet uses a full-coverage concealer on her brows; she currently likes Hard Candy Glamoflauge. (NOTE: If your brows are thicker and darker like Miss Scarlet's, you may have to do the powder-and-conceal step a few times to cover them up.) While waiting for her brows to dry, she starts creating her base. Her preferred foundation is Ben Nye cream in Lite Beige, applied with a sponge wedge. Don't be shy with it--as Scarlet says, "Just dip your face in it and hope it sticks!"


Then it's time for highlighting and contouring. Scarlet used Ben Nye Character Shadow in CS3 for her contour and applied it through her temples, the top of her forehead, the hollows of her cheeks, underneath her bottom lip, and around her eyes (although she sometimes holds off on that last part if she's doing something more "natural"). She skipped contouring down the sides of her nose this time, but we both often recommend thinning out your nose for drag. Her highlight is Ben Nye Cream Highlight in Ultra Lite, applied at the tops of the brows, up the bridge of the nose and through the forehead, just above the jawline, and around (not right in) the eyes and cupid's bow--she prefers to use shadow in those tiny spots. Where you contour and highlight is going to vary based on the shape of your face and, if you're trying to do drag, which parts of your face you need to look softer or more sculpted.

Also, while it's awesome to start blending your highlight and contour in to your base, this is also a good point to leave the base makeup be for a bit so it can "cook" (a drag term for letting the makeup warm up on your skin, making it easier to blend). This is best done with theater or photography makeup, which tends to be fuller coverage and wetter in formulation; most "regular lady face" products will set.


Scarlet often uses her Character Shadow for her brows, but in this case, she was doing a character brow, so she used green shadow instead...and looked bonkers doing it. I think she was saying something to me when I snapped this picture. XD Then she lined around her eyes with NYX Jumbo Eye Pencil in Milk.


Now it's powder-down time! Scarlet beats her face with some Ben Nye Translucent loose powder, rubbed in to a big puff. I mean, she literally beats her face; I always tease her about it. Anyway, for this look she used the Fair shade, while she uses the regular Translucent shade for character looks with colored or Kabuki-style bases. This powder not only sets everything in place, but it also blends it out further, making the highlights and contours look a bit more natural. (But just a bit, cause dammit, this is drag!)


Now it's time to cake your eyes! She used the NYX eyeshadow base in White for her base, then added some shape with the Coastal Scents 28 Neutral palette. She added color with Ben Nye eyeshadows in Sun Yellow and Chartreuse, La Femme blush in Coral, iNuovi blush in Dolly, and a green Wet n' Wild liquid liner. Again, if you're using strong theater-type makeup, it's good to let it sit for a few minutes and cook before you smooth it out.


Applying falsies is rarely fun, even if you're a seasoned pro. ;)


Miss Scarlet used the La Femme blush on her cheeks before painting on some more leaves and blending everything out again. La Femme blushes are quite strong, so if you aren't a drag queen, be uber-careful with them!


MOAR LEAVES!!!1!one


Since the lips are green, you gotta use some wonky stuff, in this case a green eyeliner pencil as a lip liner. I didn't catch the name, but I'm almost positive it's by Prestige. The lipstick is Manic Panic Poison Ivy (fitting!), and a long-discontinued ELF Soothing lipgloss in a ruby red shade was blotted on top. Odd combination, surely, but the point was to get a "dead rose" sort of color.


Now it's time to tuck it all back and find your pussy! (I'm talking about cats, you perverts, GAWD.)

And speaking of kitties, let's round out the post with pictures of Miss Scarlet's evil cat Ladey and my lazy cat Simmis!


As a side note: I might invite Miss Scarlet to do a monthly advice column here on BOGL. How would we feel about that? Would any of you want to participate? As you can see, she's ready and willing to answer your questions! :)


Wednesday, October 3, 2012

Beauty Sightings: Sex and the City, season 1


I have a love-hate relationship with Sex and the City. On the one hand, I can see how it brought third-wave feminism to the forefront of pop culture and promoted the idea that strong, powerful women are still mere mortals. On the other hand, I found many of the storylines unrealistic, close-minded with regards to sexuality and gender stereotypes, and yes, even a little anti-feminist by promoting phrases like "I can't be in a committed relationship/marriage because I'm selfish." But truth be told, I've rewatched every episode a dozen times. The show is generally light-hearted, makes me laugh, and contains numerous beauty sightings, though they can be tricky to spot.

Season 1 beauty sightings are especially difficult to capture. The video quality didn't really go up until about season 3 or 4, so any screenshot that can capture the rough textures and colors of the items is bound to be grainy and blurry. Still, I managed to spot a few products I definitely recognized; about half of the rest look very similar. Those who are going to help me with brand names and products, please do! This show ran from the late 90s to the early 2000s.


Carrie's purse gets smacked out of her hand in the first episode. Several gold-cased lipsticks and gold-capped lipglosses pop out--they appear to be Estee Lauder--and a mascara-looking object in a thin white tube with a blue stripe. Anybody recognize the mascara-looking thing? Also, on the right, there's a tube of concealer with a satiny silver cap...I think it might be Clinique?


I can't recognize the silver compact, but a makeup artist friend of mine said that the round lipstick shape and silver-and-black tube are signature 90s Dior. Can anybody back this up for me?


A makeup artist with a bag of tools, and she's holding a sponge, a brush that appears to be from Estee Lauder, and something in a red compact. My immediate reaction was "Kevyn Aucoin!", but I'm pretty sure KA's beauty line launched closer to the time of his death in 2002--this season was filmed in 1988.


Carrie seems to keep a lot of her makeup in this wicker basket. There's also a vanity behind her--it looks like there are some serums and an eyeshadow and blush/gloss in black compacts, but they're hard to see.


Early-episodes Miranda has relatively light, natural brows. Here we see her running a spooly through her brows before she runs off to work.


Anybody recognize this lipstick packaging?


The ladies testing makeup. I'm dying to know what brand these products are! They remind me a lot of Estee Lauder, but of course, I can't be sure. The window in back seems to say "Desse," which isn't a boutique or store I recognize. (Then again, I'm not a New Yorker.)


Carrie in the same boutique holding a compact, most likely an eyeshadow.


Samantha's vanity, which cotton rounds, a powder compact, nail polishes, and lipsticks. Anybody recognize any of this stuff.


Carrie's plummy-pink lipliner. The writing is actually embossed silver. Liners are some of the hardest things to recognize because they're so tiny and their packaging is rarely distinctive.


Carrie's bathroom table. There's a Laura Mercier compact, a lash curler, and a bottle of Benetint. Makeup 411 notes that they used Laura Mercier Secret Camouflage on Sarah Jessica Parker, but I think that's a powder compact. I have a really hard time recognizing the foundation or the hair products. I'm 95% sure the pot of cream on the far right, which keeps popping up, is Ponds. (UPDATE: Emmeleine has pointed out that the cream might actually be Olay. Thanks!)


I don't recognize the liner, but those pots in the center are almost definitely La Femme cake glosses and blushes. EDIT: According to Amanda, the liner is very similar to old-school Stila. Thanks, Amanda! I think the small bottle with the white cap might be another Benefit product...High Beam or Posietint, perhaps?


Carrie applying mascara. I'm pretty sure that this is YSL--confirmation?


 Sam applying a really beautiful plum-nude lipstick.

Saturday, September 15, 2012

Beauty Sightings: Pageant


Pageant (2008) is a sweet-as-pie and dash-of-sassy documentary that follows 5 drag queens as they vie for the title of Miss Gay America. It is, in my opinion, an excellent documentary for newbies who don't know a whole lot about drag, since it slowly introduces you to one specific portion of the art form (ie, "pageant queens"). But if you're a "drag conisseur" like me and you just love to watch pretty bitches beat their faces, you'll also get a kick out of it. :) My biggest disappointment is that we didn't get to see much of the two "older" queens, Coti and Victoria (some of you may recognize the latter from the first season of RuPaul's Drag Race). It was nice the see how the younger queens are with their family and friends, though.

These queens are so skilled at putting on their makeup, however, that they tend to put their makeup on quite quickly, and it can be a little hard to catch what products they're using. BRING ON THE GIFS!!!


This unknown lovely is clearly patting some eyeshadow on to her lips. Old-school (and super-effective) drag trick!


Cleavage painting!


That pot of cream reminds me SO MUCH of a pot of Dior face cream a friend used to own...


Is that an Estee Lauder compact the beautiful Chantel is using?


Look, lovely readers--LA FEMME! Loads of it!! Also, in this scene, Chantel mentions using Dermablend as her base.


The fantastic Coti Collins using "Ru-Glue," aka an Elmer's glue stick, to block out her eyebrows.


This is a Maurice Stein pencil, yes?


Can anyone see what paint stick she's using as her base? I think it's another Stein product.


I see a blue MAC shadow, maybe MAC blushes, and--surprise surprise!--Maybelline Great Lash mascara. You guys may wonder why Great Lash is so popular, and why it appears in so many movies and shows with big pageant-y makeup. Here's the thing: it pretty much never dries out (no, really; it's creepy!), and it's perfect on top of false lashes because it won't clump them or dry them out. Hence, it's easy to clean it off of your falsies. :)


A Kryolan palette. This appears to be one of the 8-pan shadow palettes.


Plus a bottle of rubbing alcohol, some false lashes, and some compacts and bottles I can't quite identify.


Miss Alina using some powder and pulling out a powder puff. Anybody recognize those compacts?


Victoria DePaula has an open pot of Coty Airspun in her kit.


MOAR COTY!!!


Any idea what this white cream she's applying might be? A highlight? Some concentrated glitter?


Hey, it's Randy from Say Yes to the Dress!


"If you're a nice person, you can see that from the inside out." Preach, Miss Victoria Pork Chop Parker! I just wanted to include some shots of her because she's a complete doll. Younger drag queens who think it's all about being as shady as possible could take some lessons from her.